With the mobile app from Disclosures.io, you can scan documents into your Property Package with a single click. Save time and start marketing your listing instantly.
This article will walk you through the steps to scan and upload documents via the Disclosures.io mobile app.
⭐ If you have yet to download the Disclosures.io mobile app, head over to the Apple App Store iPhone or iPad: Install Disclousres.io App
🔎 Find out more about the Disclosures.io Mobile App here: Disclousres.io Mobile App FAQ
Step by Step Instructions
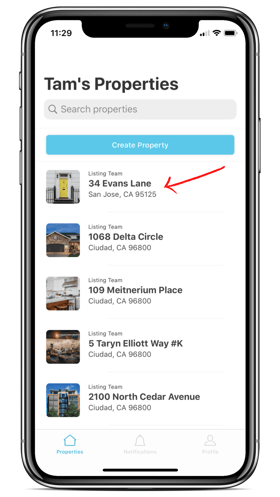
Step 1 - Go to Your Package
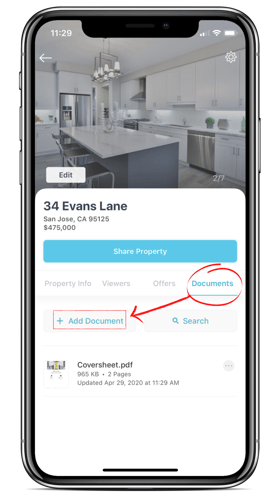
Navigate to your property package in the Disclosures.io Mobile App. In the Documents tab choose the option to Add Document.
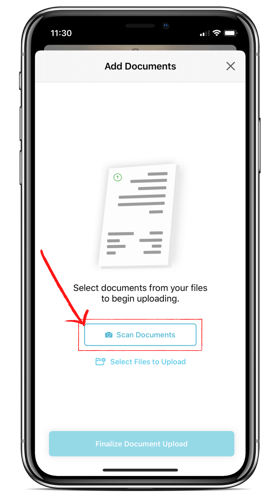
Step 2 - Select the Scan Documents Option
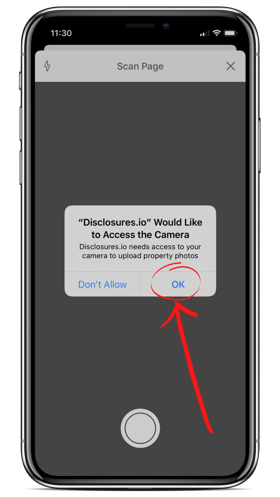
Choose the option to scan documents. When using the scan option for the first time you will need to select the option to allow the Disclosures.io app to access the camera.
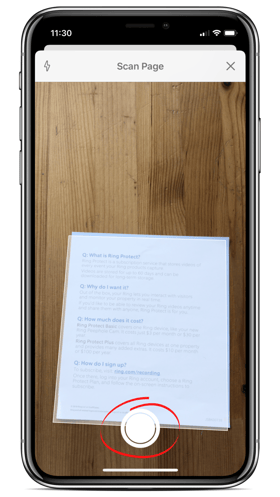
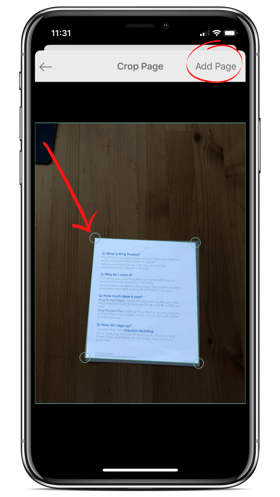
Step 3 - Scan the Document
Use your camera to scan the document. Drag the corners to adjust the scan to fit the page, then select the “Add Page” option in the top right-hand corner.
⭐ Tips for best results when scanning:
- Clean off your camera lens with a clean cloth.
- Ensure that there is enough light when scanning your document.
- Place your document on a contrasting background.
Step 4 - Edit Your Documents
After a document page has been scanned you will have the ability to see a preview of the page. Click on the four squares in the lower left-hand corner to get a single page view. When viewing the page there will be 3 editing options for the page.
- Save the page in color or black and white.
- Rotate the page.
- Delete the page.
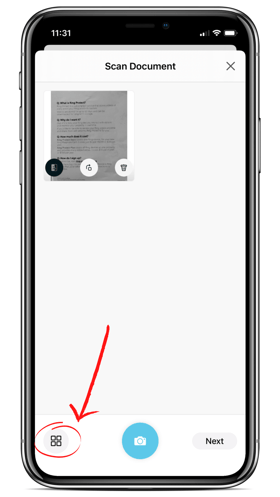

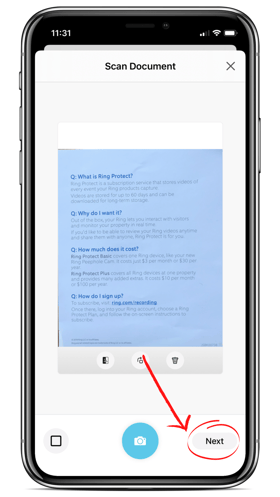
To scan another page to add to this document select the teal camera button at the bottom of the screen. If you have more than one page in a document you can also organize the pages by dragging and dropping them into your preferred order. 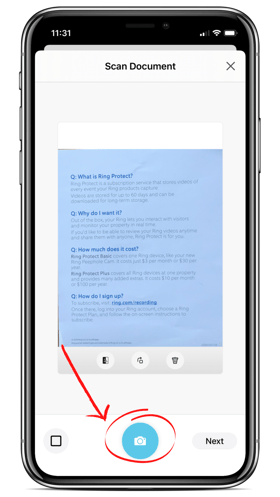
If there are no additional pages that need to be scanned select the “Next” button in the lower right-hand corner.
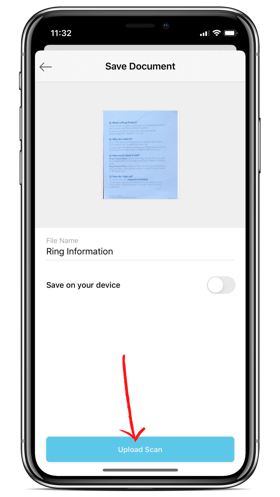
Step 4 - Name Your Document
The next step will be to name your document, this document title will be added to the coversheet. Once done naming the document choose the “Return” option on your device keyboard, then click the “Upload Scan” button at the bottom of the screen. 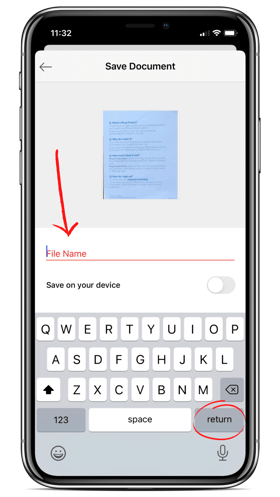
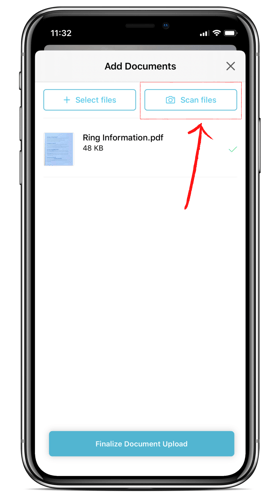
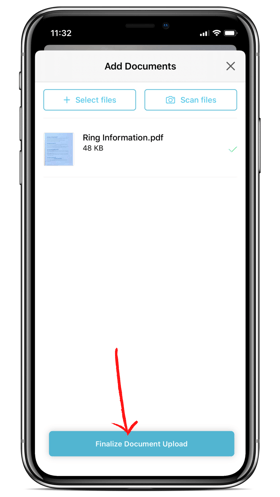
Step 5 - Finalize Document Upload
After uploading the scanned document you can choose to scan additional pages to create another document. If you don’t have any additional pages to scan click the Finalize Document Upload button at the bottom of your screen. This will effectively add the scanned document to your property package.
What’s next?
You see a green notification at the top of your screen when documents are added to the package. The table of contents in the coversheet will automatically update to reflect the name of the document(s) that have been added.
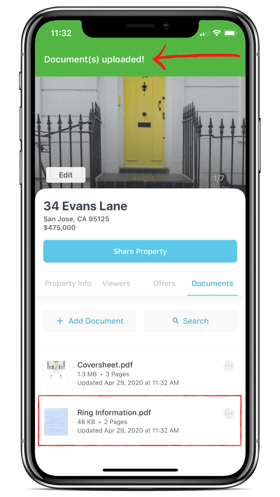
If you had existing documents in the package the newly scanned document can be found at the bottom of the list.
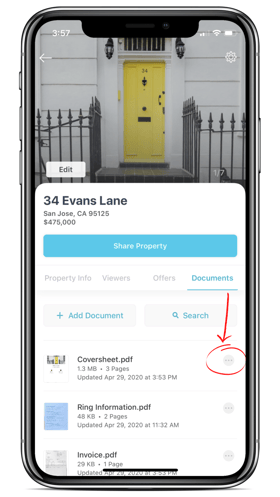
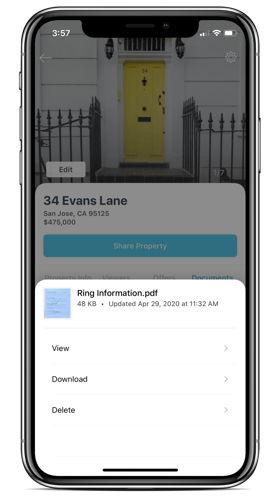
Selecting the more icon to the right of the document will allow you to view, download, or delete the file.
FAQ
Q: How do I organize the file order in the mobile app?
- A: At this time we do not offer a way to organize the file order in the mobile app. To change the order of the documents log into Disclosures.io through a web browser, check out this help article for more information: Organize the Documents in your Property Package
Q: How do I add documents from my phone or Google Drive?
- A: To add documents stored on your device or in Google Drive check out this help article: Add Documents via the Disclosures.io iOS App
Q: Can I edit documents in the mobile app?
- A: You will need to use the web version of Disclousres.io to make any edits to the document. Here’s more information: How to Edit the Documents in Your Property Package
Q: Do you have an app for Android?
- A: We currently only offer an app for iOS users. You can access Disclosuers.io via your mobile browser.
- A: The Disclosures.io app will work on your iPad. Be sure your device is updated and running on supports iOS11 and upwards.